Ever since I got my air fryer I’ve loved experimenting with cooking different ingredients in it. When I made this pork belly for the first time, I was blown away by how easy it was and how tender the pork was once cooked.
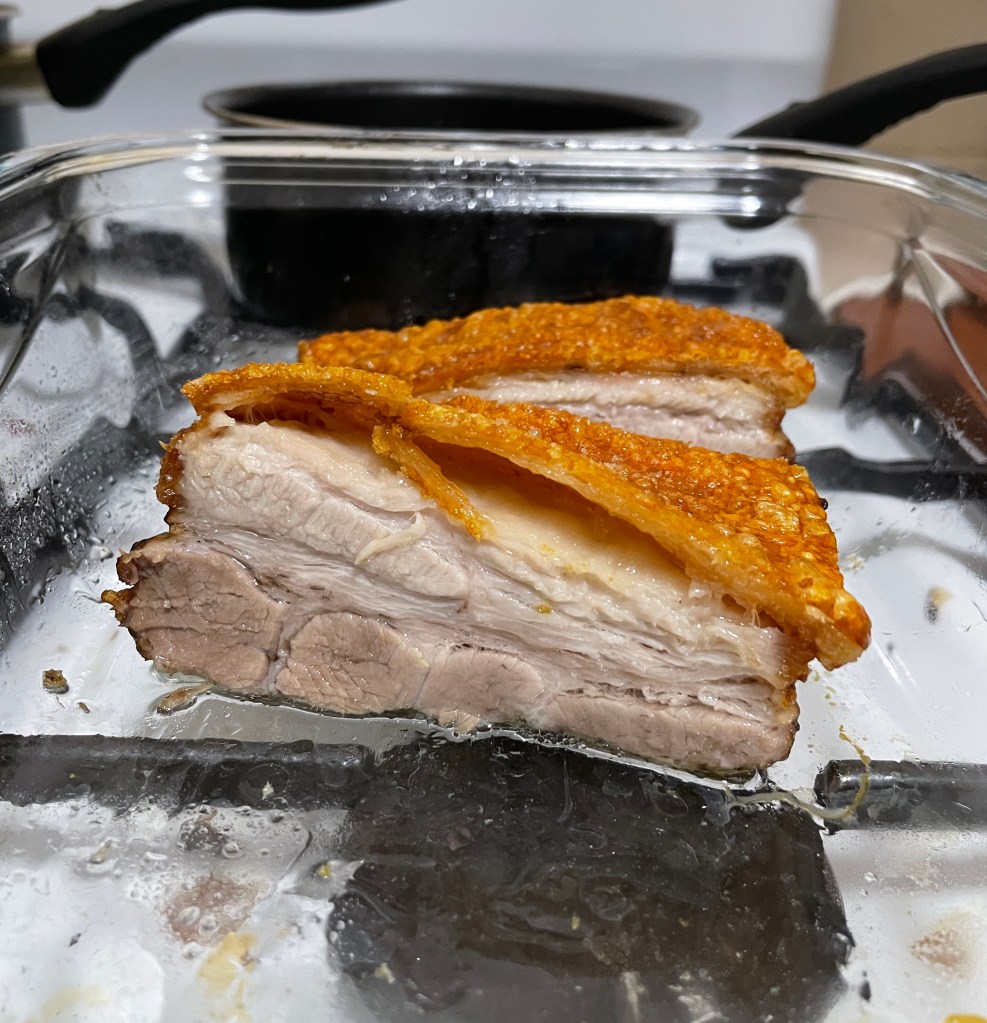
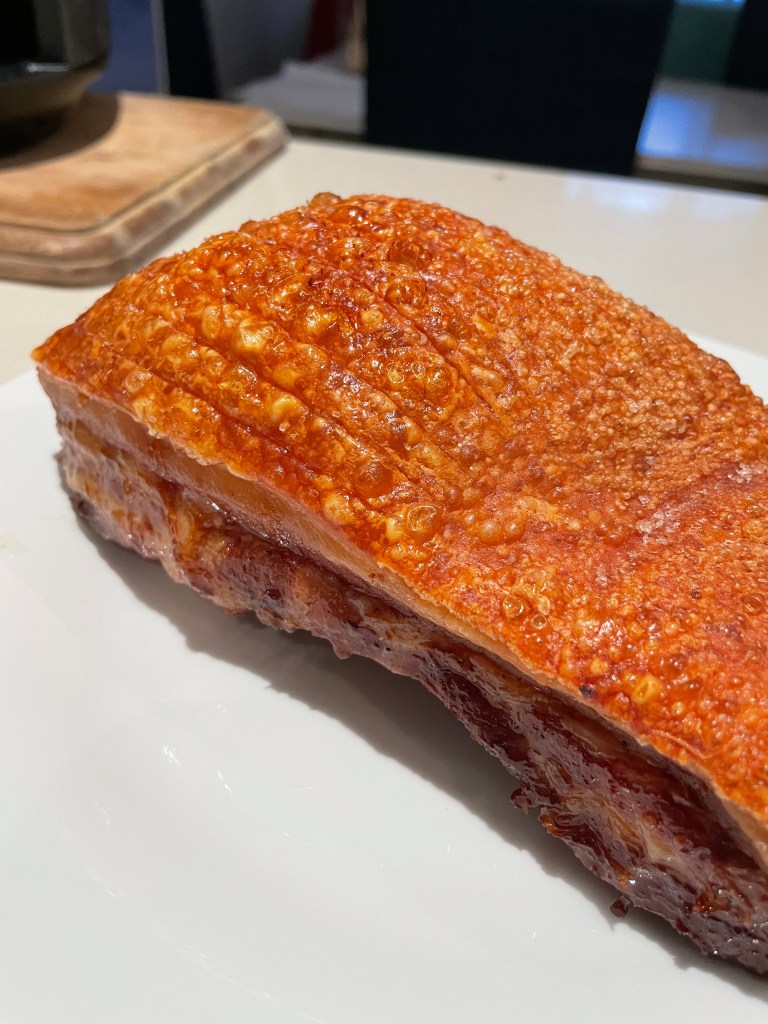
This is my favourite way to cook pork belly. Unlike the oven, where the crackling tends to cook unevenly, and the meat can get dry, the air fryer keeps it super moist and creates perfectly even, crispy skin. The end result is juicy, pull-apart soft pork with bubbly crackling.
Make sure you buy a piece of pork belly that’s smaller than your air fryer basket. If it’s too big, it won’t fit properly and the skin won’t crackle evenly.
For crispier skin, prepare the pork belly the day before by pouring boiling water over the skin, rubbing with salt and letting it dry out in the fridge overnight. Boiling water shrinks the skin, and salting and letting it dry draws moisture out to achieve the ultimate crispiness. This is an optional step, but if you don’t have time, you can prepare the pork a couple of hours before or even right before you cook it.
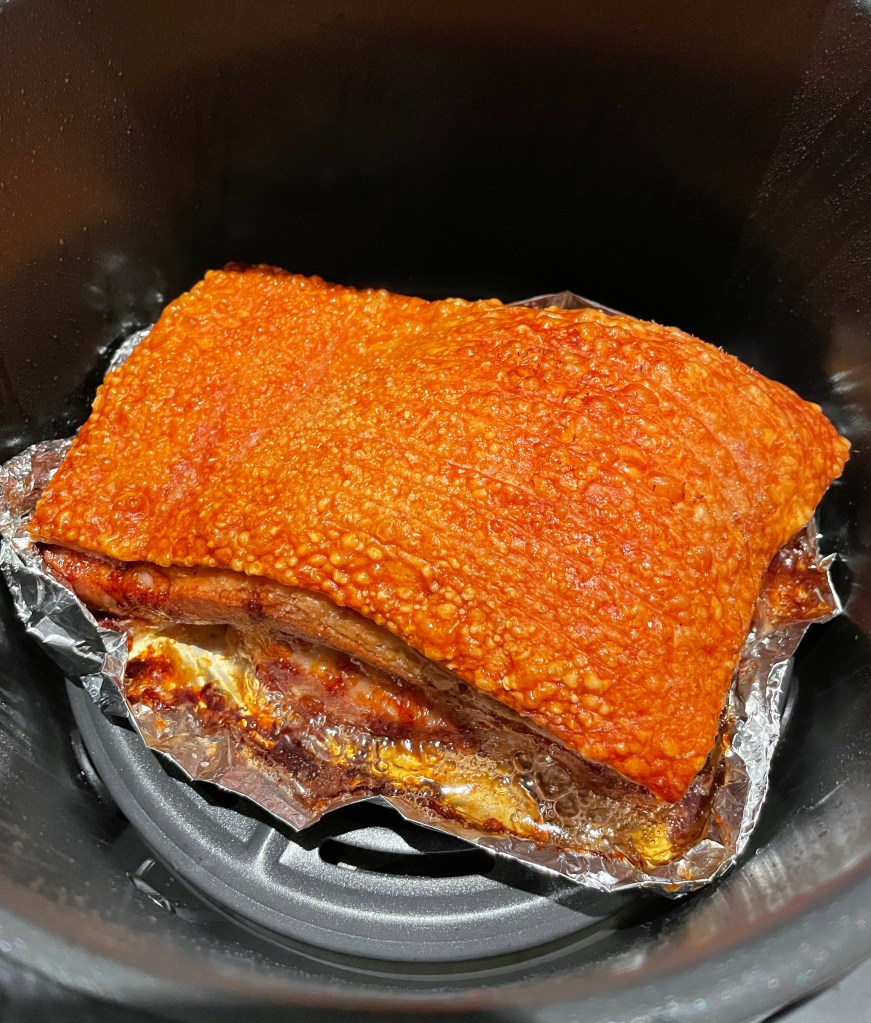
I like to make a foil basket for the pork to sit in in the air fryer. This does two things: (1) keeps the edges from drying out; and (2) captures the cooking juices for easier washing up. Once the pork is prepared, all you need to do is pop it into the basket and cook for 50-55 minutes.

There are a couple of ways I like to serve this pork belly:
- Cut into thick slices and served with gravy, mashed potato and greens
- Cut into cubes and served with chilli sauce and rice, Chinese style
It’s best eaten on the day it’s cooked as the crackling won’t be as crispy the next day. It’s so delicious and once you’ve tried this recipe you’ll be making it again and again!
Best Air Easy Fryer Pork Belly Recipe
Ingredients:
- 1 piece of pork belly, skin on (800g-1kg, make sure it fits into your air fryer basket)
- 1-2 teaspoons salt
Method:
- For super crispy skin, prepare the pork belly the day before you want to cook it. If you don’t have time, a couple of hours beforehand is good too. Place the pork belly on a plate in the sink and pour boiling water over the skin, then lift it out onto a clean plate or tray and pat it dry using paper towel. Turn the pork belly upside down so the meat is facing up and rub the meat with 1/2 teaspoon of salt and a few cracks of pepper. Flip the pork over and rub the skin liberally with the rest of the salt. Leave salt on the skin and place the pork uncovered in the fridge for a couple of hours or overnight. If you don’t have time, you can pour over boiling water and salt the skin right before cooking.
- Place pork belly on a large piece of foil and create a basket by folding the foil up around the sides of the meat, leaving the skin uncovered. This protects the edges from drying out during cooking.
- Place the pork belly with the foil basket around it in the air fryer and cook at 210C/410F for 25 minutes. After that, turn down the temperature down to 160C/320F and cook for a further 25 minutes.
- Check to see if the skin is cooked to your liking. If you want it a bit crispier, cook for a further 5-8 minutes at 210C/410F. Take the pork out of the air fryer and let rest for 5-10 minutes, then cut as you like and enjoy!
If you want to try more air fryer recipes, check out my recipe for the best spicy air fryer cauliflower here.

The 210F degree setting never got the skin crispy. I had to go up to 400F, per another recipe, for 35 minutes (and it could probably go longer) and spray the skin with oil to get it to crisp up.
LikeLike
Hi Dick, thanks for your comment! All temperatures in the original recipe were in degrees celsius. I’ve updated it and added farenheit temperatures too now!
LikeLike
Thanks for updated information. I should have got the clue when you referred to the weight in g & Kg and also how you spelled favorite (favourite).
The results of my first try was still very tasty. Almost can’t believe it is only seasoned with salt an a bit of pepper.
I can’t wait to try it again with the proper temperature settings.
LikeLike
Great to hear it still came out well on your first try! Happy cooking 🙂
LikeLike
Tried your recipe tonight – first time doing this in the air fryer! Followed your instructions but also pierced pork skin with tool before putting on salt. It worked really well, even at 200C (highest our air fryer will go). No burning, which was great and the crackling was uniformly crunchy. My niece said it was the best she’d ever had (although she says that about everything :)) I will definitely do it this way next time too – very little time spent preparing and works well! Thank you!
LikeLike
Thanks Jess so glad you liked it! ☺️
LikeLike